Showing posts with label holiday ideas. Show all posts

Tuesday, December 21, 2021

Red Star {Quilted Pillow Cover}

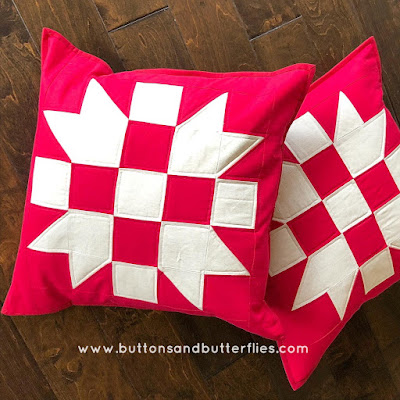
Sometimes simple large block pillows are just the ticket for the Christmas holidays.


I wanted to make new pillow covers for our new linen colored couch. I found a large star block on line and quickly did some quilt math. 


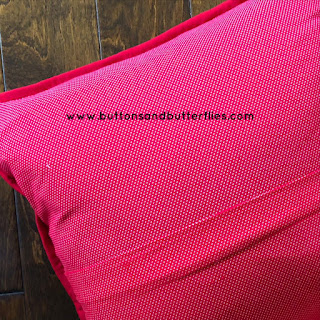
Some simple 1/4” quilting, red dotted backing, and solid red binding… 


Made for a quick finish.


But seemed to make a vibrant pop in our family room!


Happy Holidays!!!


Wednesday, December 10, 2014

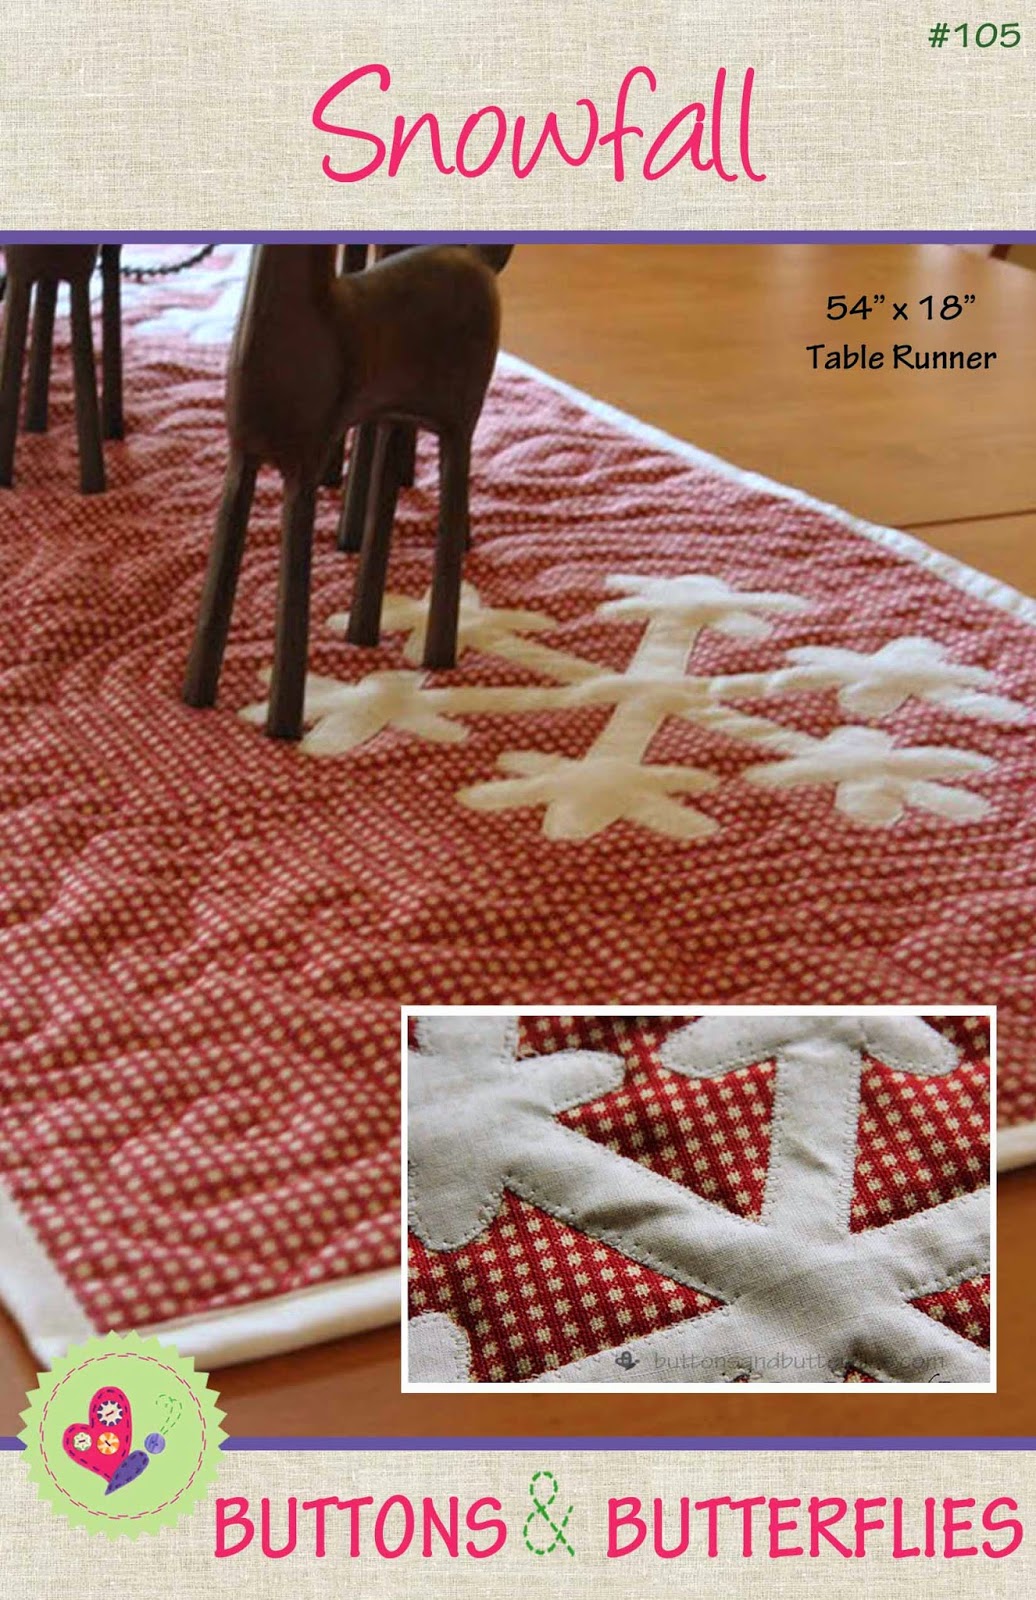
Snowfall Table Runner {Pattern}

Three years ago,  I made a decision to update our Christmas decorations.  I was looking for something more "me" and less "everyone else".  I found it with my Christmas Country .  


One of the key items that caused my desire to change was my Snowfall Table Runner.


I don't like to think that I give "empty" promises to followers... 
I don't break them.  I just deliver them late. 

As promised...I finally finished the Table Runner pattern!

http://www.craftsy.com/pattern/quilting/home-decor/snowfall-tablerunner/124179


You can find it on my Craftsy Pattern Store HERE for a .pdf download.  

And yes. Its free! I'm just trying to butter y'all up for the ones that won't be in the near future!


P.S.  To those that I promised other patterns/tutorials.  They are coming.  My technical difficulties ended up being a blessing. I was able to organize all of my photos and tutorials better!!  Keep your eyes peeled!!!

Friday, August 31, 2012

Utility Aprons

Didn't I promise you that I would tell you about these aprons I made last Friday and only gave you a sneak peak?


I picture you sitting at your computer, phone, or iPad....tap, tap, tapping your fingers...holding your breathe....then puffing it out.   You yell at the computer....WHERE IS THE POST SHE PROMISED!  I am totally kidding....I know you aren't. You have so much more on your mind than that. 

 At least you better!

But I do want to share with you how they came about and what tutorial I used!  If you recall, I used to work at my sons' school as the clinic nurse.  I already was friends with many of my co-workers, even before that, but my friendship with one particular person blossomed even more while I worked with her.  She runs the desk at what we sometimes called the "little campus" where the pre-K 4 year olds and Kindergarteners were.  The main clinic where I was parked at is at the "main campus". Because of that distance, she manages the wee ones bumps, bruises, and fevers.  I was only called over for things that we needed to consult on more serious issues or the "uhhhh, we got creepy crawlies over here....time to check a whole class worth of heads"...you get what I mean, right?

 The two campuses are only separated by a driveway, but when there is an emergency?  It can feel like two miles!! How do we know if there is an emergency?  We used a walkie talkie.  You have to carry yours around you all day long.  I made this little bag when I first arrived so that I could stash not only the walkie talkie, but my cell phone, and keys to open the exterior doors of the buildings.  

November 2010

I also made her a version with the school plaid material.  Unfortunately, she has a heart the size of the entire Earth (remember Meemah's quilts?) and gave her little bag to a sweet little girl who thought she could have it!  Since she gave me the quilts earlier this year,  I have been meaning to make some gifts for her.  She mentioned different things here and there and as the new school year approached I thought I would focus on getting the things done before the school year ended, right?

Recently, I pulled out this little bundle from my stash for her that I have been hoarding.  


It was bought on a whim from the basket of clearance goodies at Joann's fabrics and I sorta coveted it because I liked the vintage feel.  I was short a few fabrics for other projects, but I was able to squeak out a utiltity apron for her.  She can slip her pen, walkie talkie, and paper for writing down her lunch order numbers and any other goodies she would like to have on her!


I found this great utility apron tutorial via UCreate at Rosey Corner Creations.  Trust me, I am saving you hours of searching!   It was a perfect size and I liked that her tie straps were substantial and long enough to wrap around a normal sized woman...not a skinny child! And the ability to have more than a few mixes of fabric really appealed to me.

As luck would have it, I had just enough scraps for the outside of a mini-tote....found a coordinating fat quarter for the inside...and she could use it to carry her walkie talkie if she didn't want to wear an apron that day.


I, then, had some tiny scraps left over and made her this quilted camera strap like the one she has been coveting since I made mine here.


But, of course I couldn't stop there.  I had to make an apron for the school years theme which involves  Cowboy boots.  So I grabbed some scraps of the school plaid and added some denim and bandanna material.


Since Halloween would be around the corner, I found some orange and yellow Moda swirl in my stash and coordinated it with some black gingham and a leftover strip of Moda Trick or Treat from my Spiders and Webs quilt.


Still not done.....


Christmas!   Moda Dots and scraps from my Figgy Pudding Quilt I am working on!!!

I started preparing and cutting last Thursday, and completed them Friday afternoon.  Not long at all.  I delivered it Monday, and she loved them.  She put one on right away.  The only problem?  I am vastly worried that I will arrive at our scrapbook retreat in a few weeks and she will have something for me.  She always is giving and I can't keep up! 

Do you have any friends like that?


____________________________

Don't forget about the Thank You {Giveaway}. 
If you haven't had a chance to enter...go HERE now!!!

Monday, December 5, 2011

Lunch with Santa

Beware when you RSVP  "Yes!" to a party invitation that says...

LUNCH WITH SANTA

It may be more than you bargained for.

Have you ever been picked up by a choo-choo train from your car...ran by Santa's elves?


Offered a ride on a camel?


Or greeted at the door by a clown with a monkey?

Button's shirt says "On the Nice List"

In a Christmas tu-tu?

I have to confess....
Me neither...until this year!!

Needless to say, it will be a memorable day!

Santa arriving to the lunch on a boat.


Apparently, in Houston, the sleigh just doesn't do well without snow!


And he didn't let a little rain stop him!


Yes...that is a snowcone in Bunny's hand as Butter freezes and Bean just can't believe Santa arrived in such style!

All we needed were the tents, an umbrella, and hoodie to keep us less wet.....

Do you just LOVE this photo?

And a VEEEEERY tall Elf, named Mistletoe, to keep the spirits up while waiting in line.


Just so Button could take a good look at Santa....


And get out of there as quickly as he could!!!!


But no worries.....Button was in good spirits before we knew it!


All it took was some quick thinking on big brother's part.


Who knew that Butter could whip his head around so fast to make the small white cotton ball fly at the end of the hat! 


So all was right in the world......

Friday, October 7, 2011

My Haunted Mansion


Let me start off by saying that I am a Halloween rookie!  I grew up in a house that didn't decorate for Halloween, didn't give out candy, and certainly didn't trick or treat.  
Sad, right?

I have tried to catch the spirit through the years, but I always seem to gravitate to "Fall" decorations and cutesy type decor. 
Last year, the boys made it abundantly clear that our house was not SCARY enough.

So I had to make this:

Into something cool like this:

Halloween Express


I spied this photo in the Halloween Express catalog and felt like it was the look I wanted.  Not terrifying.  Not cheesy.  Not childish.  It reminded me of my favorite Disney ride, the Haunted Mansion.

 I was inspired.  I had the mantle, but not the cool garland or cool candelabras.

A challenge.   I am always up for a challenge!

GARLAND


 Supplies:  Two strands of Christmas garland. Black spray paint.

This one had ornaments and berries.  That didn't stop me!


I'm not going to lie.  

The two strands literally gobbled up a can and a half of spray paint!  Every time I turned it over, I'd find a sparkly or red spot!


CANDLES


Some old wooden candlesticks from my SECRET STASH.

If you don't have any hanging around, just go to the Goodwill.  I just treat my Secret Stash as my very own Goodwill!

I loved the dripping wax.  Just painted right over it!


I also had these nickel ones from my "Everything must be silver/nickel" stage of my decorating life.


Don't worry..they weren't real. See the label!  And don't ever pay full price at Hobby Lobby...there is ALWAYS a sale.  Just try to wait them out!


 TIP:  WHEN WORKING WITH SPRAY PAINT USE THESE.
Gloves will save you some heartache! 
It is a bear to get it out of your fingertips!!


WOLF PICTURE

I wanted to cover up my portrait without removing it (too heavy to take down myself).  
I found this photo online.

Wish I could credit, but can't find it again to link!!!


I decided to make my own.

Supplies:  
Matboard (32 x40 inches), Acrylic paint in white and gray, Brushes, Chalk pencil, Cardboard.


You don't have to use cardboard, but I really needed something the about the size of my mat board and something thick enough I could trace around.

I sketched it out and then cut the cardboard.  I just wasn't confident enough to draw it out with the chalk.  I cut the cardboard and then traced my final image on the mat board.


I started filling in the whole area with the white paint.  I tried to keep it very wispy for a bit of a ghostly effect.


I then placed drops of gray in various spots.
 
 And the shadows in these pictures...I have a baby...I've gotta do this whenever I can get a chance!!!
But isn't it a bit spooky?


To get the crater look that the photo had, 
I swirled the gray around and then added a bit of white and swirled it until I got the effect I was looking for.  I am NO artist, so I promise you, I was winging it!
I tried putty with no luck.
Instead, I poked a hole at the top two corners.  Run some twine through the holes.
There was no equation to the length of twine...again, I just winged it and it worked out for me on the second try! (the twine is wrapped all the way to the back of the frame.)

Hang it up on the edge of your frame. 


 Add some books.  I had some paperbacks already wrapped in different shades of off-white/white/beige papers from a previous decoration in my house.  Scary portrait dude (in the far left corner) was  dollar store find when I was on a scrapbook retreat.  It is a hologram of a guy, we named "Bob", that turns into a skeleton.  He was only 2 bucks. 


I already had existing dark/black candlesticks, so I mixed them all up with the newly painted ones.  I found all the off white and white candles from my candle drawer.

I grabbed some dead branches with dried up leaves and sprayed more black spray paint. (This is Butter's favorite)


A quick run for the glow-in-the dark rat and skull from Target....and the ceramic crow on clearance at Hobby Lobby.


And a few white pumpkins (carve-able) from Hobby Lobby.


The boys FREAKED out when they came home.  I was happy because it is was relatively inexpensive to put together, cool enough for me to live with and just scary enough for them!   PHEW!

I also found a fog machine for the boys so they can scare people Halloween night....but that is the extent to the outdoor scariness that I will contribute to!

I am still not quite ready to be THE Haunted House of the neighborhood!

LinkWithin

Related Posts Plugin for WordPress, Blogger...