Showing posts with label design wall. Show all posts

Sunday, August 18, 2013

Studio Spotlight

If you are here from Ellison Lane, welcome!

First off, I want to say.  To the quilters that have to take their sewing machine and sewing baskets out of some small linen closet and work on the dining room table?  I've been there.  To the ones that share their space with a guest bed and home "office".  Been there.  To the ones that have to go down to a dark, spooky basement.  Yup. Been there.  To the ones that have had to go to the room that was once an attic and is far away from the family?  Been there!!

In the last 17 years of marriage, I have had to sew where ever I could.  I even remember sitting on a floor with my leg awkwardly pushing the pedal when we were in a temporary apartment waiting.

I am so blessed to have this space now.


When we were about to move again, my only request to my husband that we found a layout where I could have my own space, close to the action.  


The view off our kitchen, which happens to be an open floor concept to the family room.
 First door bathroom.  Second door, studio.  Laundry room straight ahead.
Garage on the left side out to where my longarm "studio" is!


I have a load of pictures for this area...but for another day.
But back to my main area!!

I always get asked about the cabinets.  They are not custom.  We did not have someone build them. We went to Home Depot and Lowes and bought either pre-built or put them together ourselves from boxes.  They were added over time...not all at once.  It actually just started with a few of the lower ones in our last house.


On the right side when I walk in is what I call the work area. 
 Computer, files, printer, phone. Paper.
This side of the room are kitchen counter top height so I can sit on stools or just stand.


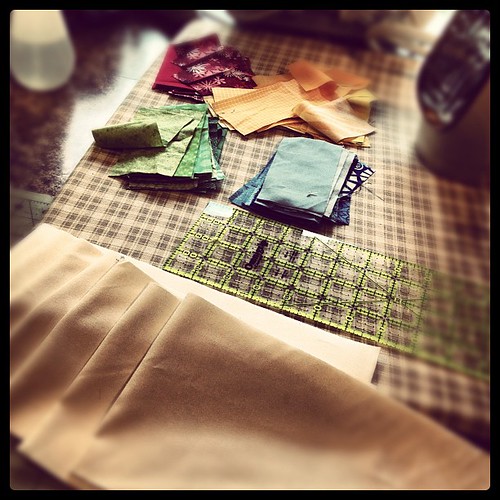
My cutting tools and current project file boxes are easy access for when I need to work.


And the TV. 
I can't live without background noise while I am working.  Especially when the boys go back to school.  The silence is deafening and makes me miss them greatly.


I use the upper area to display some of my mini quilts and my American Girl Dolls.
When my husband's grandmother passed away, we were offered some items and both he and I agreed that I would keep her yellow sewing basket.  It still has some great vintage scissors and notions inside.


My favorite area.
How could you not love fabric?!?!?


Yum.  I have mini-bolts on the top shelves and then baskets filled with layer cakes, fat quarter bundles, and charms.


And more yum. Some jelly rolls anyone?
My new Lindstrom 1930s toy sewing machine under the sweet mini quilt from a Name Game Swap.


Portable design wall behind the door.
There are actually two stacked. I pull them out and stand them together for bigger quilts
It currently has no projects right now because I have more tops completed and the other projects are in "cut" stages. 

But Button makes use of it every chance he gets.

The next area is my island.
This is, again, kitchen counter height.
Cutting. Ironing.  Pretty Jars with ribbons and notions.


The island consists of cabinets that made an "L" in my old attic studio in the last house. 
We reconfigured it to make the square.  
I also wanted an overhang area so the boys can sit on stools and work at it for big art and school projects.

 
I hope that someday I can address the counters!
 They, again, were just premade laminate counters we found at Home Depot.
They clean up well, but they are getting a bit "bleh".  I also never got around to painting the island like I wanted to.  Someday.  Quilting gets in the way!


I call this side my sewing area.  
We ordered file cabinets so that it would be lower than the rest of the counters.


My sewing machine stays permenantly on the countertop.


Fat quarters and more ribbon are up above in the cabinet!


I put my embroidery machine away in my closet when it is not in use. 
 I like to keep the counters as uncluttered as possible.


In the center, I have my buttons, patterns, and a plaque with my daughter's name on it. 
The main reason I have been quilting so much the past four years.


More jars.  Can you tell I like jars?  They are in the center to collect binding leftovers for my "someday" full scrappy quilt.  I also store all the leftover triangles I have to use as leaders and enders.


The tall cabinet store some of my scrapbooking supplies.  The other supplies are in my island.
But, generally, scrapbooking only happens on my retreats.


Above is my birdhouse collection. Actually.  It was my grandmothers.  She gave them to me when she had to move into their retirement home.  They didn't have room for them, so I told her I would keep them for her.  I made the birdhouse quilt at the time, but lately, the traditional colors are just not working for me.  I am pretty sure you will see something in the future take it's place.


We are just not going to talk about this very packed 10 foot high closet, are we?
I do love my bin organization for projects though.

And to keep Button busy?


He has a basket of toys to play with!
But mostly, he gets into my stuff.


My sitting area.  


The cover on the chair-and-a-half is for my pugs that keep me company.   They love to set their heads on my shoulder while I do handwork.


And yes, more jars.  My hexie templates, needles, and more buttons.  
I like buttons.

 And last but not least. 


Lighting.  
My dearest husband installed these because without them?


THE REALITY.

I wouldn't be able to sew at night without them.  This is a shot of my honest craft room.  Most of my sewing happens in the wee hours of the night when everyone else is sleeping.

Go to Ellison lane and join in the Studio Spotlight fun.

I am going to hunt for ideas.  I have been feeling  like I need to make my room less "old fashioned" as someone recently said when they saw my room.


***UPDATE:  The studio finally got a facelift.  I couldn't be more thrilled!***
STUDIO MAKEOVER

Monday, August 27, 2012

Virtual Sew In

Ever done one?

I tried to find a definition or some cute image, and I couldn't find one...so I made my own!

Photo via Instagram


An online friend did a shout out a few weeks ago on Facebook.  I had a ton to do and needed some dedicated time to do it all in. How could I not say "Me! Me! Me!"

Admittedly....Mr. Boss laughed at me when I told him my plans.  He finds these online interactions odd, but I explained to him that all I was basically asking for was 6 hours of uninterrupted sewing time. The gals and I would just be posting our progress, questions, and encouraging each other!  Baby and kid duty would be his.  
He being the wonderful man he is?  He agreed!

 I thought I would share with you how the day went...so here goes!


Saturday, 9:42 am

Slept in.  I was up late Friday night getting things planned. I popped onto Facebook and said "Hello".  A few of the ladies were just getting started. 
However, I needed my coffee and my shower ASAP!

Saturday, 11:30 am

  Mr. Boss left with Button to go grocery shopping.  I turned on my iron and pulled out my first projects (scrap fabric, tools, etc) for the day.

Saturday, 11:42 am

Showed off my plans to the group.  Then commenced cutting fabric.

Saturday, 11:54 am

An inquiry was made about where we were working. Photos of our spaces were requested...and they had to be current..messes and all.  
 
Question mark= secret project (taken with my iphone)
 I have to admit, it made me feel like we were sewing together on a retreat!


Saturday, 2:00 pm

All my coins (2.5 inch x 5 inch) were cut out.  88 rectangles cut from all my scrap bins.
 I also cut my 7 pieces for the sashing and borders (Kona Snow).

Virtual sew in with some online friends. Quilt top pieces cut!
via Instagram

I have to admit. I was really wishing that I had bought a charm pack at this point.  I could have cut it in half!  Two hours is too long to cut fabric!


Saturday, 2:30 pm

 Coins and sashing completely laid out on my design wall.
(can't show you the picture...secret project...don't you hate that?!?!?)


Saturday, 3:05 pm

It was time to switch gears and not think about the quilt top.  I completed the cutting of 8 black and white pieced strips (4 jelly roll strips sewn into a rectangle) into 56 triangles for a second Spiders and Webs quilt.

Cutting black and white triangles for another Spider and Webs quilt!
via Instagram


Saturday, 3:17 pm

Finished getting the triangles on my design wall.
 By luck, I had the other quilt top laid out on the lighter side, and flipped it to the back (remember I made a black side for my portable wall design) just to get them up. 


As luck would have it?  I liked the black!  I have now made the decision to do black triangles instead white like I originally intended.


Saturday, 4:18 pm

I pulled out my Christmas top I had started here.
  I spent an hour cutting various sizes of my scraps to make the trees and trunks. 

Cut out trees and trunks.  I am rapidly realizing that I have not even touched my machine during this SEW in. Off to rectify this situation!
via Instagram


However, it was at this point that I realized that I was really doing a "cut-in" day instead of a "sew-in"
day!!!!!


Saturday, 4:30pm

I immediately went to work piecing all the coins and sashing. Mr. Boss even commented that I REALLY meant business when I took the cover off my Symphony. He also could not believe how much I had accomplished since I started.  

 Of course, around this time is when there were a lot of  interruptions...baby up from his nap, which meant me sewing with him on my lap or making sure he wasn't turning the machine on when he started feeding fabric to the machine.  Not to mention dinner, clean-up, driving a teenager to the school dance...and so on!


Saturday, 10:57 pm

  And I had a finished top...44x54!  Just in time to pick up the teenager up from the dance!


I can't show you all of it, so it is just a sneak peek because it is a surprise quilt, and I don't want a certain someone to get the drift...even though she is pretty smart and will! 


Sunday, 12:02 am

I returned home and had a MAJOR second wind.  I have horrible insomnia and driving around and listening to the radio station playing club music had me pumped!

I decided to get to work on a paper piece project.


Sunday, 2:53 am

Called it a night!  
I had finished piecing three letters out of four.  I was very distracted at this point because a few of us were burning the midnight oil and getting pretty silly online chatting!


I was making friends with Jack the seam ripper again. Sometimes, you have to stop when you are just not making good decisions!


Sunday, 3:10 pm

Finished the last letter.  Had to squeeze it in during laundry, football fantasy draft (I am Team "Yo Momma"), school/sports calendar planning for the week, and homework round-up.


So...not too shabby, hunh?  I feel really satisfied today!

The bonus?  Because I knew that I was sewing on Saturday, I wanted to get some unfininished gifts out of the way Friday!  I can't share those yet, but I am so excited to have made significant progress this weekend!!!  I would just like the momentum to keep moving!

My point of this whole post?  

If you can't make it out of the house to go on a retreat far, far away.  Here is what you do:
  • Do a shout out to your fellow online sewing friends
  • Set up a private group on FB
  • Pick a day on a weekend that everyone can do
  • Plan specific projects for that day
  •  Get sewing ladies!!!!

P.S.  I am actually going to do a GIVEAWAY. for you, my loyal followers.   
I will announce it on Tuesday, August 28, 2011
Stay tuned!

Friday, May 4, 2012

The Perfect Portable Design Wall


I have attempted many times to hang some flannel in my studio.  I have even used the stand that I used to display the t-shirt quilt HERE.

 But I have no luck.  My blocks fall off.  The dogs run by and knock all the blocks off or knock the whole flannel piece down.  
It is always a mess.

 I am then stuck laying it out on the floor.
Not my favorite choice!


I have popped onto Oh, Fransson's blog occasionally, but really liked her enough to follow her (I really have to limit...my reader currently has 606 posts that are unread)

When her post on her design wall popped up, I was intrigued.

  I ran to Lowes.  I bought two foam insulation boards (4ft x 8ft) for $15.96.  I also ran to Joann's for a King Size (90 x 108) roll of Cotton batting...cost $39.00 (but $23.99 with a coupon from their APP).

I am only posting how I made mine, because, of course, I had to make some adjustments for my needs!


I wrapped mine around the front...my batting is a bit more cream, but there is a reason why!  I suggest making sure you get a white!

I stapled it to the back...and here is my "tweak"


I wrapped some black flannel to cover ONE of the backs.  I don't anticipate a huge black quilt in my future, but I thought it would be nice to have a black if I was considering a dark background quilt.


 I also used packing tape around the edges like she suggested.  It protects the edges when I am moving them around.

I did not secure mine together, because my studio has ZERO wall space because of my cabinets and windows..

 You can see more of my studio HERE.
 I have both stacked (one behind the other) behind the door.  It covers the pocket door going into the adjoining bathroom.  I can just walk out to the hall to access it, so no big deal!


Now you can see why I like the cream? 
 Makes it blend with my door!
I have to confess, the fabric sticks to the batting about as much as it did to the flannel.


 but I use small pins with much effectiveness when I want the blocks to stay a bit more permanently!

I especially love that I can move it to my laundry room for a large quilt.


I am still contemplating on cutting the second one down to a smaller one, but I am not sure what the point of that would be since I would have no place to put it!

Go to Oh, Fransson to see her specific tutorial!  I can't thank her enough for the tip!


LinkWithin

Related Posts Plugin for WordPress, Blogger...