Showing posts with label Creative Grids Rulers. Show all posts

Monday, June 13, 2016

Little Ruby QAL {Jelly Roll Quilt} Part Two

It's time for the next round of the Little Ruby Quilt Along with Fat Quarter Shop!
Constructing that quilt star blocks!  


In case you just arrived and said, part two??  No worries!  Part One is HERE.
Make sure you watch the video below before starting!  Kimberly points out some very useful tips!


My Quilt

First, let us simply admire the yummy jelly roll chain pieced pile. 


Honestly? This part was enjoyable. It's pretty mindless and I need that here in and there while working on a quilt. This is the easy stuff.  Press the strips open. Cut triangles...


I've decided after using this Creative Grid Strip ruler, I feel the MOST comfortable placing my hand inside the triangle.  Placing my fingers on the straight edge is a little too close for comfort.


Next step. Separate the two block parts.
Print (left) versus Solid (right)


This is where things slowed down for me. I wanted to be thoughtful with my blocks by playing with color shades with my fabric selections.
Grab up your six "print" block parts to make your first quilt star block.


 Follow Kimberly's instructions in the video about the dog ear placements


 Do you just love!?!?!

Remember that "bonus" second quilt?  Here it is!!!

Gather your solid bottom triangles and arrange them like this.


The original one on the video and image appears to be scrappy, but this was my first rogue moment. I decided to use the same print for all the block parts. 


Piece the block units just like the first block.


A second quilt block!!
I'm getting very excited to have two quilts that are alike, yet different!

Check out what everyone else is up to!!!


Melissa from Happy Quilting
Angie from Gnome Angel
Erin Cox from Why Not Sew
Andy from A Bright Corner
Pat from Pat Sloan
Peta from She Quilts a Lot
Heather from Quilt Story
Megan from Quilt Story
Amanda from Jedi Craft Girl
Sherri from A Quilting Life
Rebecca from Bryan House Quilts
Jemima from Tied with a Ribbon
Stephanie from Modern Sewciety
Brooke from Silly Mama Quilts
Carrie from Moda's United Notions

Stay tuned for the Quilt Top Assembly!!!


Monday, May 30, 2016

Little Ruby Quilt {Jelly Roll} QAL

Little Ruby quilt along


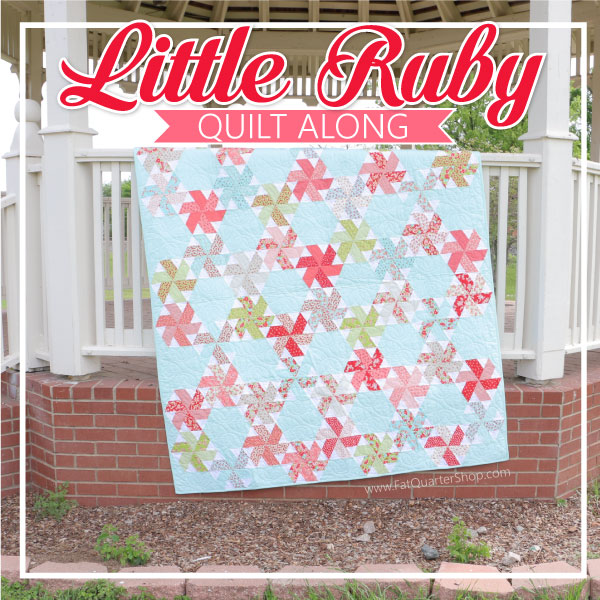
Fat Quarter Shop and Camille Roskelley have teamed up to bring you the Little Ruby quilt pattern. It uses 2.5″ strips, or a jelly roll or two, plus the new Creative Grids 60 degree Double Strip Ruler and the Creative Grids Hexagon Trim Tool.  When Fat Quarter Shop asked if I’d like to join the quilt along, the pattern caught my eye, but the real draw was that the pattern makes TWO quilts from all the triangles you cut to make the hexagons.  Since I have TWO matching chairs in my family room, how could I resist making two quilts.
 (Quilt A is shown above, hang tight for more details on the second one)


Little Ruby QAL fabric
Part one?  Choosing fabrics! Little Ruby quilt pattern yields, what I call, a generous lap quilt, at 65″ x 72″, using two jelly rolls. You can also purchase a Little Ruby quilt kit if you really love Camille's line!

I, however, was looking for a something that fit my needs.  I needed what I'm calling my Summer Quilts.  I have always associated red, white and blue for the summer.  It always seems to start with Memorial Day in the beginning, end with Labor Day, while Fourth of July is sandwiched in the middle.

If you have been following me for a bit, this isn't the first time I've joined Fat Quarter Shop on a blog hop for one of their quilts.  Before they ever asked me to participate in one, I had already used their Simply Fat Quarters book for three patterns (Poppy, Marbles, and Thistle).  I love the simplicity of their patterns. They also seem to break up what can be, sometimes, a tedious process into a simple and enjoyable way.  

Their videos are excellent companions for those who need more visual instructions. 
 Personally?  I just think Kimberly is a doll! Here is the part one video:


My Quilt

I have had a huge crush on Kate Spain by Moda Fabrics, as of late.  In particular, the Aria line.  I'm sure you can guess it might have something to do with the butterflies. I particularly love that it had the red, white and blue I was looking for, but also a companion green.
 

  I couldn't resist the Aria Butterflies in Rose and Water for my backings.  The tiny flowers in  Aria Rose Abloom and Aria Navy Abloom seemed the perfect binding.

Instead of Jelly Rolls, I opted to purchase some Moda Bella White Solid by the yardage, because I needed to bulk up my background stash, and let's be honest...its cheaper to cut the strips yourself. It didn't take long to slash up my white into 54 2.5" strips.

I had a HUGE debate about matching my background with the solid strips that will become the stars, but I went out of my comfort zone and went a little wild and purchased the Aria Navy Cascade for my background.  I'm hoping another quilter chooses the other option so I can see how that plays out!


I made quick work in cutting my strips to prepare for subcutting.  Have I mentioned how much I love subcut instructions in patterns?  Fat Quarter Shop always seems to have them!

My confession.  I only purchased the Creative Grids 60 Degree Double Strip Ruler when I found out about the QAL.  I already had a Fons & Porter Hexagon Ruler, because we all know how much I love hexies!! They appear to have similar traits...it seemed silly to buy another one??  


Well.  I was wrong. WHOOPS!
My ruler is only 6.5" and the Creative Grid Hexagon Tool is 8.5".  My new ruler arrives very soon, so I have my 11 strips ready to go for when it arrives.  The hexagons seem pretty simple.  I noticed that the big key is to make sure that you are getting the seam allowances in your cut. I promise I'll add a picture as soon as the ruler arrives and I cut my hexagons. *ducks embarrassed*


Thankfully, I had the RIGHT ruler for the triangles and made quick work.   


The ruler is definitely tricky and I did a shout out for tips and advice from fellow quilters on Instagram.   A few mentioned to make sure I was putting even pressure on the ruler. I also think your orientation to the ruler is tricky.  Play around with different techniques!


If you missed the part where Kimberly flips her fabric to continue the line of triangles?  Never fear.  You just need to make sure you line up the edge of the last triangle on the ruler against the fabric edge of the new one.  The key to the triangles is that the point is "cut off" for future piecing.


With the majority of the cutting done, I will be ready to start piecing! Stay tuned!
edited to add:
Star Block Construction
Quilt Top Assembly

I've been included in a very amazing list of quilters!  I really, really suggest you go check out and see what the others are up to.  I can't wait to see the different versions of this quilt!


Melissa from Happy Quilting
Angie from Gnome Angel
Erin Cox from Why Not Sew
Andy from A Bright Corner
Pat from Pat Sloan
Peta from She Quilts a Lot
Heather from Quilt Story
Megan from Quilt Story
Amanda from Jedi Craft Girl
Sherri from A Quilting Life
Rebecca from Bryan House Quilts
Jemima from Tied with a Ribbon
Stephanie from Modern Sewciety
Brooke from Silly Mama Quilts
Carrie from Moda’s United Notions


 **I was provided with store credit to buy a portion of my supplies. Trust me, I still have some significant skin in the two quilts....All opinions are 100% my own.


LinkWithin

Related Posts Plugin for WordPress, Blogger...