

Our family room is very red, gold and green. I have been wanting to introduce some BLUE to it. Seems crazy to have blue with all these boys? However, the "fall" colors drive me a bit crazy lately!
I have had this project in mind ever since I saw it in my magazine.
So I cannot take full credit.
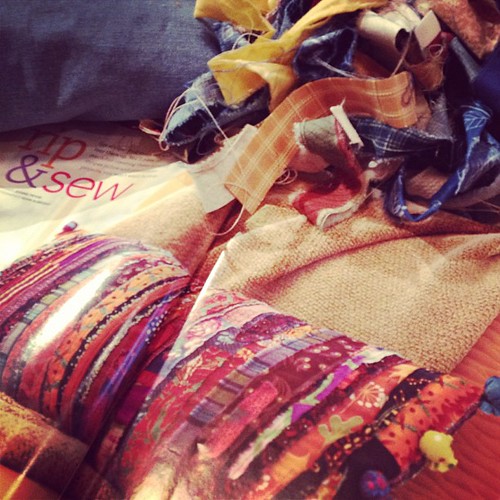 |
| Photo of my scraps and magazine (BHG Fast and Fabulous Quilting Ideas) |
I can say it is not as cute as the one in the magazine with it's ball trim, but I like it!
It seemed that last Wednesday when I was guest host at Freshly Pieced, there was some interest. So I thought I would share you the general run down!

I started off with a denim scrap panel from one of the boys' long ago denim duvet covers I made them 10 years ago. I cut it the width and then the entire length (front and back side) of the pillow and added about an inch seam allowance. However, I suggest you add more to the length to accomodate a button closure or what I call pillow sham flaps if you desire.
This is the easy part. Grab all of your scrap bins and started finding pieces that are mostly the length of the panel I had and the colors you want.
My first priority was to make sure I used up some of the scrap home decor fabrics that are just taking space up in my scrap bins.
My first priority was to make sure I used up some of the scrap home decor fabrics that are just taking space up in my scrap bins.
RIP
You simply rip the fabric. You find a spot about 1-2 inches wide and start ripping it.
If a fabric won't give? Snip a starter cut and rip away.
Some pieces ended up being cut like that interfaced red woven fabric below.
They remained strong against my onslaught!

SEW
Grab your scraps and sit in front of the machine and add the strips.
A straight stitch down the middle. That is all.
A straight stitch down the middle. That is all.
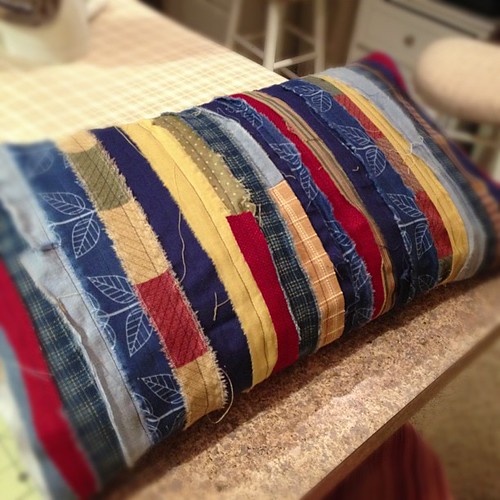 |
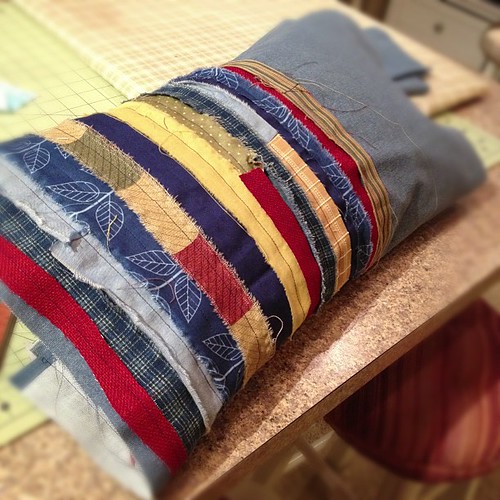
| Trial Run |
I debuted it on my pillow form by just wrapping it around and I was really happy with the finished panel! I think it would be really fun as the front of a pillow sham in a boys bedroom!
CLOSURE
Now this is the easy part if you are making it permanent. Stitch the short ends right sides together with an inch seam allowance. Fold in half. Stitch one end together by machine. Turn. Stitch open end close.
Problem?
I wanted a throw pillow cover. I had a conundrum. Button closure or zipper? A quilter remarked on my guest post that the frayed bits might get caught in a zipper. So I started scrummaging through my button collection. However, a new challenge presented itself. My panel was too short on the back for a good overlap flap to accomodate buttonholes. So zipper it was.

After a little brainstorming, I decided to bind the ends like a quilt and then add a zipper.

Trim the edges and add a folded 2.5 inch strip to both short ends with a 1/4 inch seam allowance.

I then ironed my binding and started doing my handsewing to the back...and then had an idea. Why not attach the zipper to the binding before I handstitched it down?
You already have a crease where the binding would fold over, so pin the zipper to the edge (like the photo above) so that just the teeth (or coils if we are getting technical) are exposed against the binding.

I left the zipper open so I could eye the crease. Stitch down using a zipper foot and a straight stitch.

This is preference thing, but I don't like having problems with the loose edge of the zipper. To tame the floppy zipper tape, stitch the zipper to the outer edge of the binding also.

Handstitch the binding down with a ladder stitch, just as you would with a quilt.

Fold the panel so that zipper is in the center back. Trim the ends because they might be a bit uneven.

Stitch an overlock stitch to keep the end strongs. Pillows in my house take a lot of beating. Since I didn't have my serger out, I used what I thought resembled some sort of over-lock stitch! It was late and I was too tired to look it up in the manual.
CAUTION!!!

If you decide to attach a zipper, make sure you leave the zipper OPEN a bit so you can turn it once you sew the ends. You can actually unzip something from behind, but it is quite a bear.
And I speak from experience!

When you flip it right side out? A nice clean edge against the zipper!

I am really happy with my two pillows!

I think they bring the perfect punch of blue!
Now it is time to take on the couch....

It came out beautiful. I love the idea!
ReplyDeleteCute!
ReplyDeleteThis is so cute... thanks for your tutorial!
ReplyDeleteAwesome and interesting article. Great things you've always shared with us. Thanks. Just continue composing this kind of post. Blankets
ReplyDeleteHere are some quick tips for getting the kids to bed -- and getting them to stay there! floor bed
ReplyDeleteIn any case, a pre-owned sewing machine is best bought from a confided in vendor.Sewways.com
ReplyDeletePillow counselor rundown: Exceptionally delicate and agreeable and worth a go espeically on the off chance that you are looking for neck and shoulder help with discomfort, however once more, not for everybody and far-fetched to turn into the standard. discountmattressnova
ReplyDeleteThis is really a nice and informative, containing all information and also has a great impact on the new technology. Check it out here:Pill0ws
ReplyDeleteDetermine what new accessories you'll need for your new bed. To further improve the support you get while you sleep you may also want to consider a new pillow. fleet mattress
ReplyDeleteWonderful article, thanks for putting this together! This is obviously one great post. Thanks for the valuable information and insights you have so provided here.
ReplyDeleteREGARDS best sewing machine under 500
Really very happy to say,your post is very interesting to read.I never stop myself to say something about it.You’re doing a great job.Keep it up
ReplyDeleteBest Regards:
spanish tutors in bangkok
This particular papers fabulous, and My spouse and i enjoy each of the perform that you have placed into this. I’m sure that you will be making a really useful place. I has been additionally pleased. Good perform! dekbedovertrekken
ReplyDeleteThis is such a great resource that you are providing and you give it away for free. I love seeing blog that understand the value of providing a quality resource for free. 토토사이트
ReplyDeleteI impressed by the quality of information on this website. There are a lot of good resources here. I am sure I will visit this place again soon.
ReplyDeleteCompany Logo Tablecloth
Amazing idea of making a multicolored pillow cases for your home decor and adding artistic paintings matching with these pillow cases for less using vybe interior discount code
ReplyDelete