I was about to just skip WIP Wednesday this week since my list looks EXACTLY like last week's. I am still in
Survival Mode. I did go on my
Scrapbook Retreat and finished
75 pages this past weekend.
But when I came back, arrived to a semi-happy baby Sunday, who evolved into Monday night's not-so-happy miserable baby. We had an all night coughing/crying session which proved to be croup and a sinus infection Tuesday morning. Needless to say, studio time has been vastly decreased to nothing.
However, when I thought about it, I did finish something right before I left for my scrapbook retreat, a project I never shared, and not to mention I do have a new project! Therefore, I am skipping the long laundry list...and just jumping in with those things!
Finishes:
Mini Design Boards
I am cheating. I really finished these a few weeks ago and meant to do a whole post on it's own, but I fear I will never actually get to it. So here it is!
Ever wish you had a small design board just to do one single block? Or you want to take a complicated block you have cut and arranged on your big design board like my big
portable one...but you don't dare take it down and mess up the order of the block by the time you get to your machine?
These boards will help you! I used the
tutorial from
A Bee in My Bonnet.
She talks about cutting strips, but I cheated and used a jelly roll I had sitting around! I will admit, this project took me several days.
She has the tutorial in two parts because it really is best to stretch this project out!
The photo above was taken after an afternoon spent of cutting the foam and gluing the batting to the foam boards. It IS easy, but all the glue is time consuming. I get really cranky about hot glue stuck on my fingers!! Anyone else?
I used my jelly roll to it's best advantage. I only had to piece two strips together for the 12 x14 boards.
I was able to get these different sizes from several foam boards.
These
boards are great and already have come in handy. I can get all of my
Merry, Merry Snowman applique pieces pre-cut and can lay them out on the
boards and not have them all mushed up
(yes, mushed is a technical
term) in a baggie.
They are also light, so easy to carry around. I have one more foam board left because I was waiting to see what size I really needed. I think I really need some 14x14 boards for my monthly
do.Good Stitches blocks!
Butterfly Kisses
I
love doing my
charity work, but sometimes, I am EXTREMELY happy with a
finish, and this is one of them! This quilt was special because the mom
had the quilt made locally with Farmall fabric. The quilter did all
of the quilting by hand and is was done well! I was nervous because I did not want to mess up an already great quilt, right?
For some reason, the heavens were shining down on me and made sure my
Emore was on her BEST behavior!
I did the footprints for big sister
first.
Then little Dalton's feet went into the center. Sooooo very tiny!
*sigh*
I
promised Dalton's mom that I saved the thread color # so I can make sure that
WHEN, not IF, the future brings them a sibling, his or her block will
match!
New Project:
Gone Hexagon Crazy
It has happened. I have finally caved. I have been trying to avoid ANOTHER handwork project, but unfortunately, I get CADD
(Crafter Attention Deficit Disorder). Sometimes I just get plain old BORED with some of my current projects. Adding the hexagons to my busy work carrying case will definitely give me more choices.
What finally pushed me over the edge?
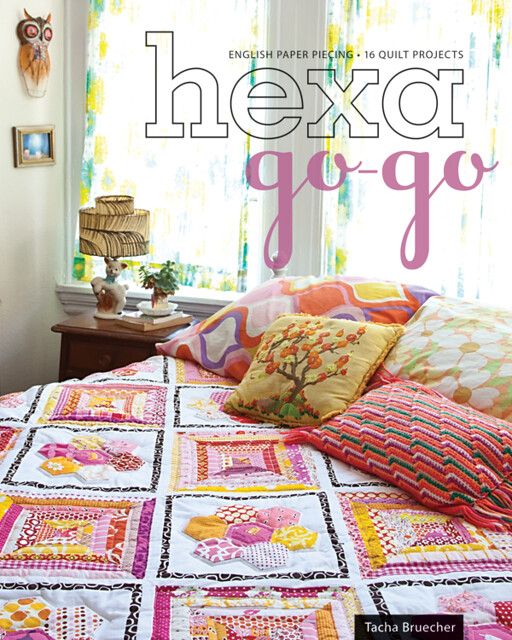 This book.
I have seen it being offered as a giveaway on a blog hop. After trying to stalk it, I gave up and bought it. Now I am stalking my mailbox to see when it arrives. They haven't even given me confirmation that they sent it yet!
This picture right below is what clinched the hexi craze for me!
Does it inspire you!??!?!
I found templates
HERE and have the different sizes printed and cut out. I have decided to do one inch
(each side is one inch. See? I am learning things already!) hexagons for the project I have in mind. They were really easy to cut out. I started cutting them out during Middle School tennis tryouts in the afternoon, cut a few while Button was playing cars before bedtime, and then the rest of the 100
(is that too many?) while watching
The Big Bang Theory with Teen boy!
It will be part of a thank you gift for a very special lady that has done a very special thing for me
(more on that in the future, I promise!!). I am hoping this bundle I picked up the other day will work!
I also picked up the
Accuquilt Die Cut to have all of my fabric pre-cut. I am going to try it on my
Sizzix Westminster Pro die-cut machine. I bought the Sissix because it seems to be more adaptable...so here is to hoping that the accuquilt die works...I will keep you posted.
Anyone else joining the hexi craze or holding are you still holding off?
I would love to here some great tips, thoughts, and if you know of any great tutorials, please let me know!!!!!
Linking up with Lee!
~Heidi