
Remember this pillow cover?
I think I promised a tutorial.....

No one requested it, but I always like to follow through on my promises. I finished this in February, but I have been a bit busy with Button and a complicated tutorial took a back seat! It also didn't help that I had all of my pictures lost on my old laptop!
A Brand New Heart: Foundation Piecing Tutorial
(WARNING: THIS IS A LONG ONE! I FIGURED THE MORE PICTURES FOR THIS, THE BETTER!)
Supplies: Design, Paper, Marker, Fabric Scraps, Sewing Machine, Scissors/Rotary, Tool, Thread

 |
| Figure 2 |
Using your paper and marker, trace the design you have found. There is fancy tracing paper and foundation paper...but I am going to be honest, I pulled this out of my computer tray.
Each fabric is marked by a number which I will call Area 1,2,3,4,....etc...
I created one design myself for another project, but found that I need a little practice.
This heart was from the booklet, Love and Friendship Quilted Pillows by Leisure Arts, Inc.
NOTE: The first few steps involve all of the first three areas which actually secure the FIRST fabric (Area 1)

Grab your first fabric. You are going to cut out a piece slightly larger the size of your first numbered area. I found that pieces that were larger than a 1/2 inch all the way around gave me more leeway for mistakes.
Completely cover Area 1 of the foundation with your fabric, RIGHT SIDE facing your foundation paper.
Pin your fabric to Area 1
Fold along the line
(the one that is adjacent to Area 2).

Trim the excess fabric to 1/4 inch away from the edge of Area 1 that you folded back
(adjacent to area 2...see figure 2)

Unfold Foundation.
Rough cut your next piece of fabric for Area 2.

Match your right sides of both fabrics and align the edges of piece 2 with the trimmed edge of piece 1.
Turn foundation over to front and re-pin both fabrics to Area 1.

Sew along the drawn line between Area 1 and Area 2.
Extend your stitches just a bit past the junctions.

On the back side you will have extra fabric past the stitched line. This is okay, because you need that when you keep adding more fabrics!

Open out piece #2.
Press.
Pin fabric #2 to foundation
(see figure 2).

Time for Area 3!
Grab your fabric piece...again, more than 1/2 inches all around.

Fold foundation on the line where Area 3 meets both Area 1 and 2.

Trim fabric 1/4 inch from fold.
Unfold foundation.

Line piece #3 along the edge.

Sew along line.

<Backside view>

Open out piece #3.
Press.
Pin fabric #3 to foundation
(see figure 2).

And for GOOD MEASURE, I will go through it ONE MORE TIME!
Area 4!

Fold your next edge (the one that is adjacent to fabric 2 and 3.

Trim to 1/4 inch from fold.

Line Fabric Piece #4 along the cut edge of fabric #2 and #3.
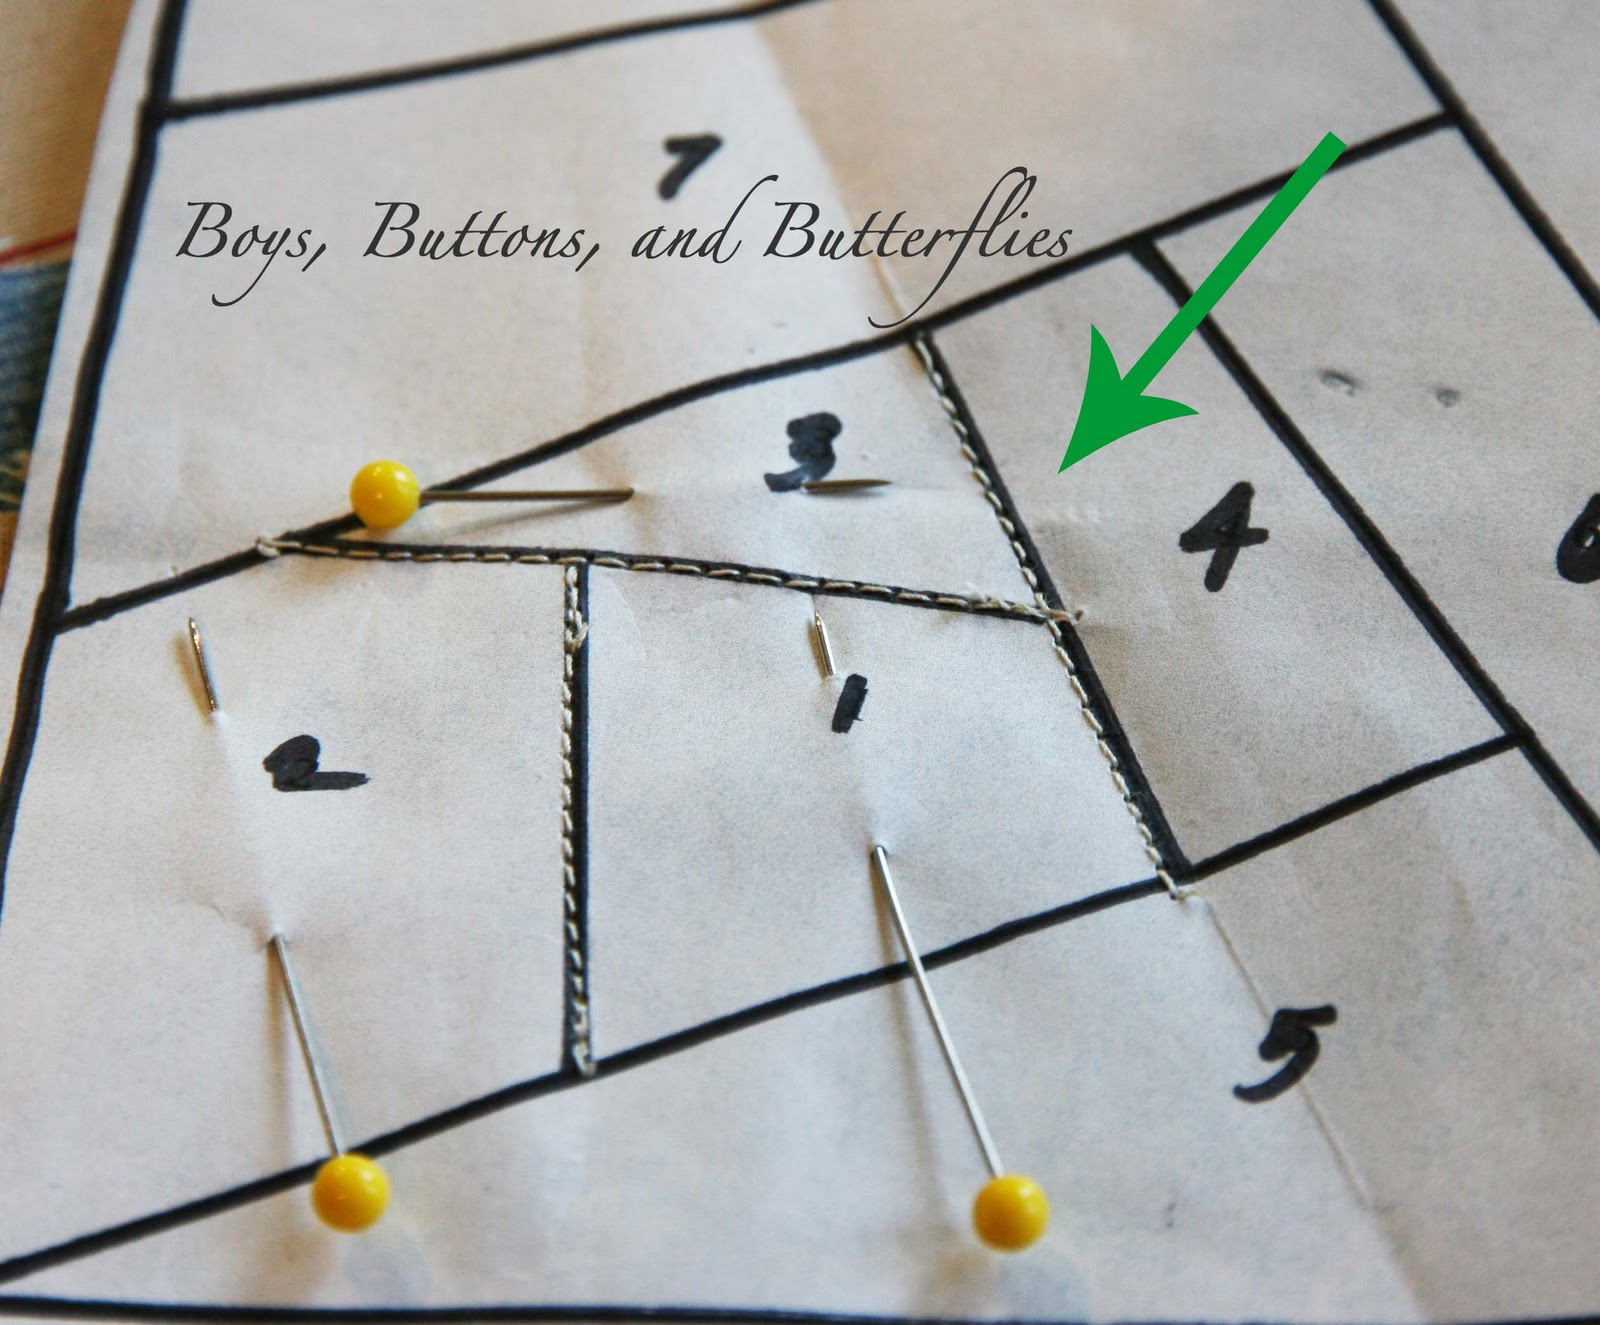
Sew along line.

Open out piece #4.
Press.
Pin fabric #4 to foundation
(see figure 2).

Again?
Just so you can get your rhythm?
Next in line Area #5.
You can see in this picture how it crosses with #2, #3, and #4.

Fold over your next edge.

Trim the previous fabrics 1/4 inch from fold.

Line Fabric piece #5 with all three previous fabrics (#2, #3, #4)

Sew along the line
(on the foundation paper)
This is what it looks like from behind!

Open out piece #5.
Press.
Pin fabric #5 to foundation
(see figure 2).

Repeat the steps, adding pieces 6 through 15.
As you make your way to the edges of the heart, be sure you backstitch to reinforce.
Your pattern should be completely covered now!!!

Pretty, right?

Start tearing....GENTLY.
Remove each piece gently from the fabric. Your stitch lines should have created a perforation for you to tear it easily.

You should have a nice pile of paper to throw in the trash!
And the backside isn't too shabby, is it?
If you would like, press all your seams ONE more time.
Last chance!

Hopefully, you still have your original design that you traced from.
You are now going to trace that same shape/design onto fusible web. I am Wonder Under kind of girl!
Cut it out and iron it to the wrong side of your applique
(the seam side, just in case you are a complete newbie!)

For this pillow, the design had a sweet saying. It really spoke to me!
My pillow background is a spare linen napkin that I had from an old project.
I decided to lay out my phrase and the heart for the correct positioning. Once I was satisfied, I ironed the heart to the front pillow fabric. I personally like to turn in my edges 1/8-1/4 inches under while I do this, but it is not necessary.

Once it was set, I did a simple zig-zag stitch all around the edge.

Then I did an embroidered stitch with some floss from my collection. I just did a really simple, uneven running stitch.

I used an old piece of sewing tracing paper.
I just took a sharp pencil and re-wrote over the paper and the tracing paper.
A bit messy, but it is what I had on hand. Another option would be to wing it and write with a quilting pen/pencil. Or if you don't trust yourself, you could use a hot-iron transfer pen.

I used the same embroidery floss as the outline of the heart to do running stitches for the words. I had a few sweet heart buttons that were begging to be added.
I made a simple envelope back for the pillow.
And now it has a permanent home in my studio....until the holidays. My Christmas Birdhouse has to have a turn.
And there just might be a Halloween or Fall pillow cover this year!


