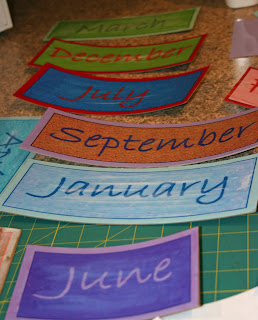
Twelve months in a Year Magnets....for my Family Calendar!
It is a simple decoupage project! But hey, in case you've never tried it, here goes!
TUTORIAL
Materials Needed:Printing Paper
Scrapbook Paper
Cardboard
Modge Podge (matte or glossy)
Magnet Strips
Computer
Printer
Directions
 Step One: On your computer, use a Word document such as Microsoft Word. I used text boxes that I could manipulate. I then chose a fun font at the largest size on "Landscape" layout that I could. I then used my Word to choose different colors for the font (to match the five colors of my bubble magnets) and also added backgrounds befitting the month (January-Snow, February-pink dots, March-green). I then printed them out and let them dry.
 Step Two: Cut out the Month around the edge. "Paint" glue on the back of the printed paper. Place the printed paper on the cardstock (see...green that matches the bubble magnet).
 Step Three: Cut out the cardstock, leaving a 1/4-1/2 inch border. "Paint" the glue on the back of cardstock and place on cardboard.
 Step Six: Add magnet strips (I like the kind with adhesive backing).
Here is what this month's looked like with the Bubble Magnets!


No comments:
Post a Comment
I cannot wait to hear what you have to say! Seriously! It makes my day!